.jpeg)
While Adobe Premiere Pro may be one of the most dominant forces in all of post-production, that doesn’t mean it’s the easiest to use. While you may have mastered Multicam sequences, layering secondary Lumetri color corrections and modifying audio channels, many editors palms start to sweat when they reach for File -> Export -> Media. Frankly speaking, it isn’t the most intuitive window, so we’re here to break it down and highlight some settings you might not be aware of, and, just as important, other settings that you might be tempted to hit when you shouldn’t!
We can’t possibly cover every possible option found within the labyrinth of the Export Settings window, but we’ll focus on the most important and most confusing. First, let’s break it down into sections.
We’ll break this post down into the major sections of the Export Settings window to cover import options in each.
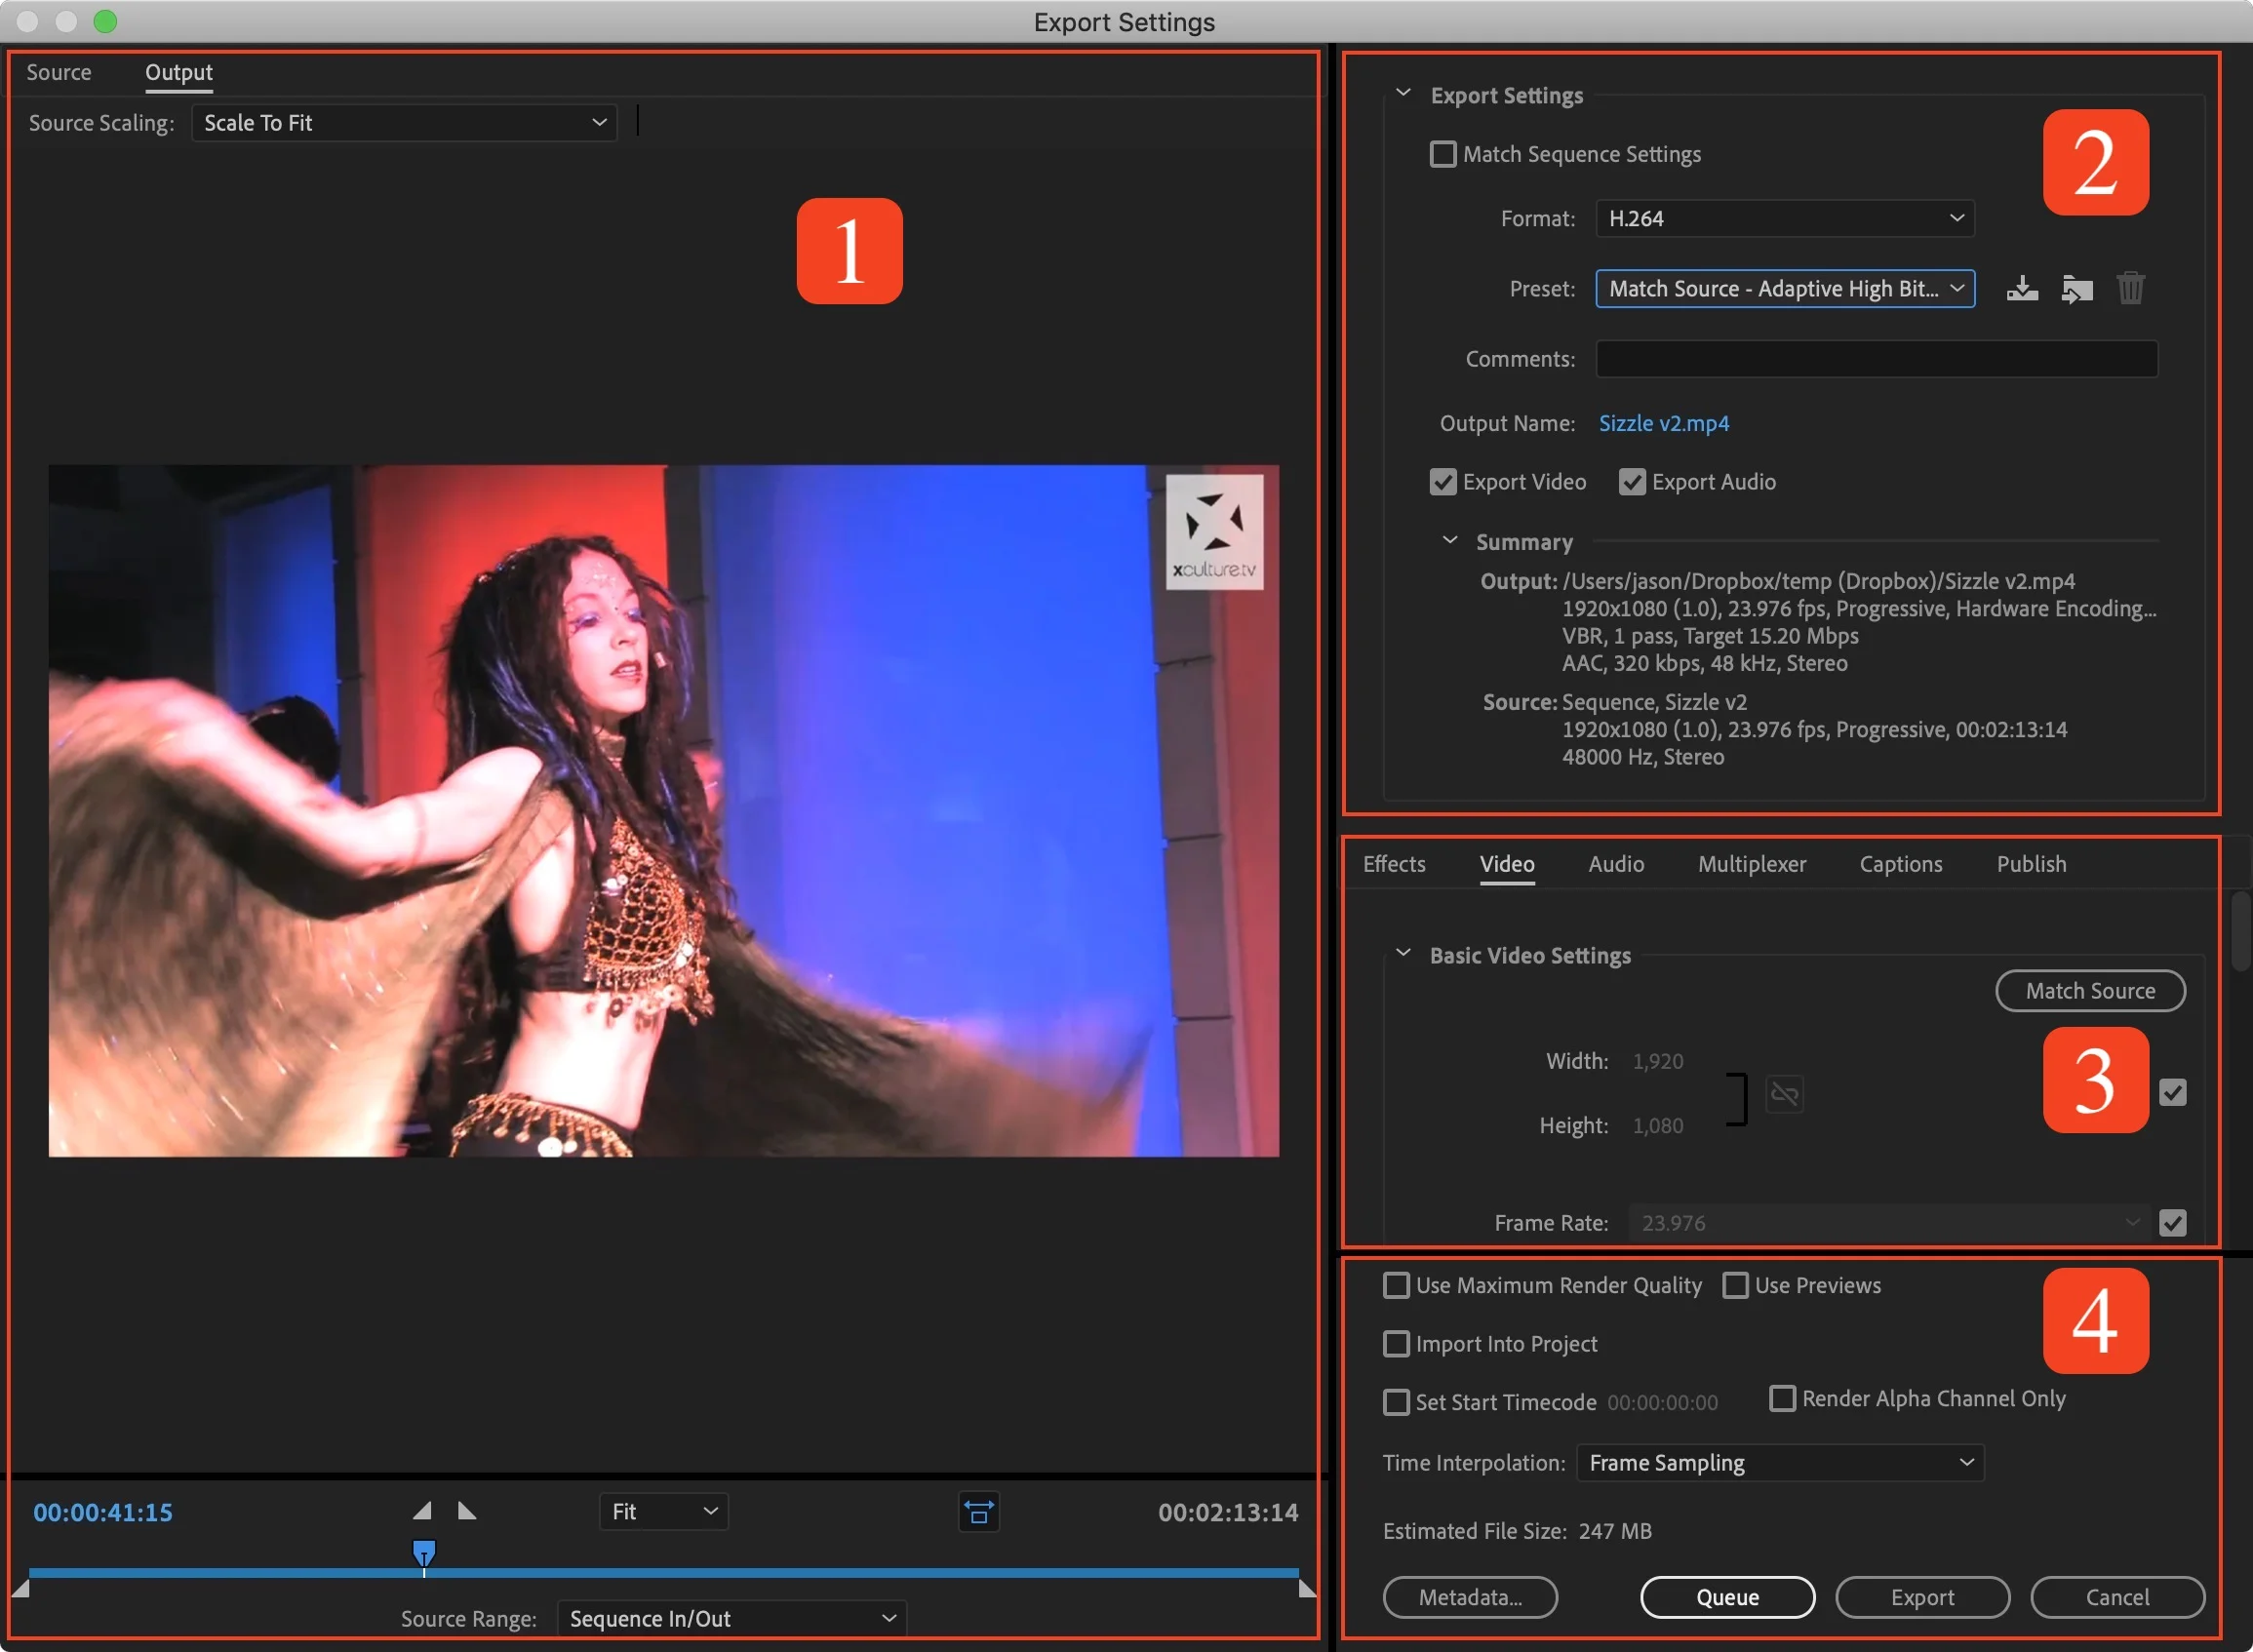
Section 1: Source Scaling and Range Settings
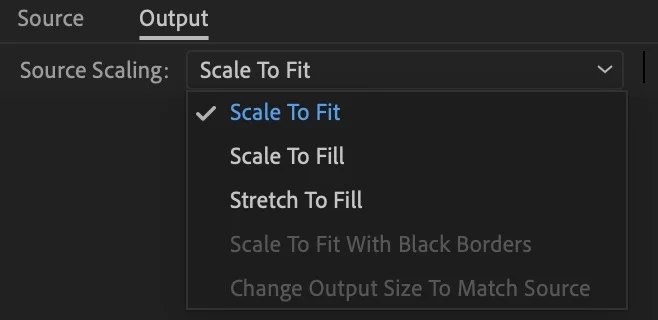
Source Scaling
Let’s start off easy. Don’t touch this one. Almost ever. Done! What’s that, you want more information? Fiiiiiiiine. This is possibly useful if you are exporting to a different aspect ratio than what you started with. If your sequence was 16x9, but you’re exporting to 1x1 for social media, you’ll typically have black bars in your output. However, changing the Source Scaling setting to Scale to Fit or Stretch to Fit will fill the black space automatically by (duh) scaling or stretching your video. Why is this a terrible idea? Because it will crop or stretch your video (double duh)!
If you need to produce 1x1 video but are starting with mostly 16x9 footage, as most of us are, you really should create a sequence that has a square aspect ratio from the start so you can pick and choose how each shot will be ultimately framed.
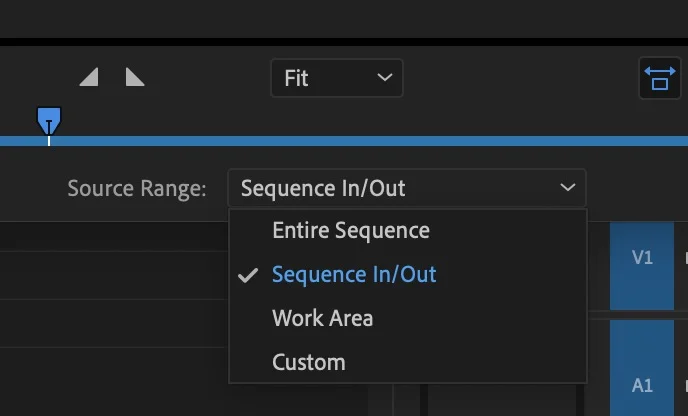
Source Range
This one is easy to understand, but the default setting can trip people up. This setting merely allows you to export a specific range of your sequence when you don’t want to export the whole thing. Notice, however, that the default is set to “Sequence In/Out” which means if you accidentally left an In or Out point in your sequence before coming to this window, you may only export a fraction of your sequence. If no In/Outs were set, there’s no issue, and Premiere will export the entire thing. Of course you can override this in the dropdown, forcing it to export the whole sequence or a custom range using the blue bar and handles right above the drop down.
Section 2: Formats, Presets, Codecs, Containers, oh my!
Match Sequence Settings
Unless you know WHY you’d be selecting it, never ever ever ever ever ever ever ever tick this box. Was that enough “evers” for you to burn this point into your brain? It confounds me why Adobe put a check box that SOUNDS useful at the top when, in reality, it will not give you what you want the vast majority of the time.
Match Sequence Settings will forcibly set your output codec based upon your Preview File Format found in your Sequence Settings (a totally different window than what this article focuses on!). If you never changed this from its defaults when you initially created your sequence, this is likely set to a rarely-used-in-the-real-world codec like MPEG I-Frame. If the last two sentences made little to no sense to you, it only proves that you don’t want to check that box! It’d take an entire other article explaining when you’d want to change your Sequence Settings defaults to accomplish Smart Rendering to explain why you might check mark that box!
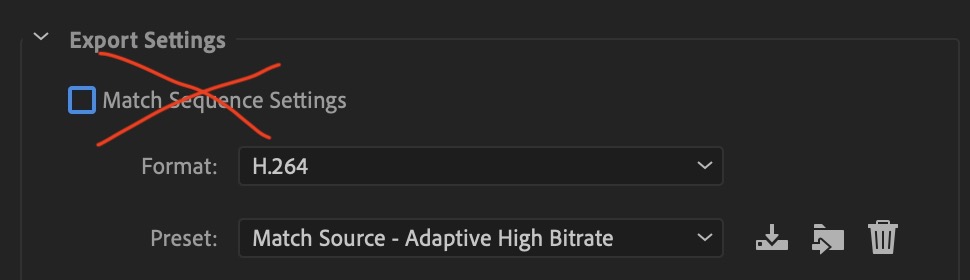
Match Sequence Settings = BAD! (most of the time)
Format
Format is sort of a squishy, wibbly wobbly word that is used in different ways in the video editing world. In Premiere, it more or less means “Popular combination of codec and container.” What’s a codec and container? You obviously didn’t read my last article, all about the topic! Check it out here.
This list is a little confusing in how it’s organized because it’s not very consistent. For example, H.264 and QuickTime are both listed. I take umbrage with this because H.264 is a codec and QuickTime is a container. Selecting H.264 automatically picks MP4 as the container, but what if you wanted/needed a QuickTime container? Well, then you have to select QuickTime from the list, which then allows you to manually select H.264 as the codec in the Video tab. Confused? Me too! Designed by an engineer, and not a UI pro, methinks.
Don’t be overwhelmed by the long list. Most of the time you’ll likely be picking from a small handful of these (probably QuickTime, H.264, HEVC, or DNxHR/DNxHD MXF OP1a) unless your needs are a bit more niche.
Preset
This is exactly what it sounds like. Depending on what Format you chose above, you’ll see a unique preset list for each. Despite what you think, these are not the only options for a Format. They are a handful of pre-made configurations that can save you from having to manually fiddle with potentially confusing settings found below in the Video and Audio tabs.
Here’s a tip. If you selected H.264 from the Format list (one of the most commons selections to make), don’t go with the default preset of “Match Source - High Bitrate” as it’s a bit outdated. Instead, you should select “Match Source - Adaptive High Bitrate.” Put simply, this preset produces slightly higher quality 1080 exports than the former and much higher quality 4K exports, thanks to smarter bit rate settings. Also, this preset works as a great catchall that should look quite good (not perfect, but close) on almost any social media platform or streaming box.
Section 3 - The Tabs of Doom
Render at Maximum Bit Depth
Despite being a simple looking check box, this is probably the most complicated setting in this entire post and likely deserves an entirely article unto itself. Yes, of course it sounds like you want to check mark this… and you may. But there are numerous factors and variables as to whether or not you will gain anything from it or if it might just slow down your export with no noticeable benefit.
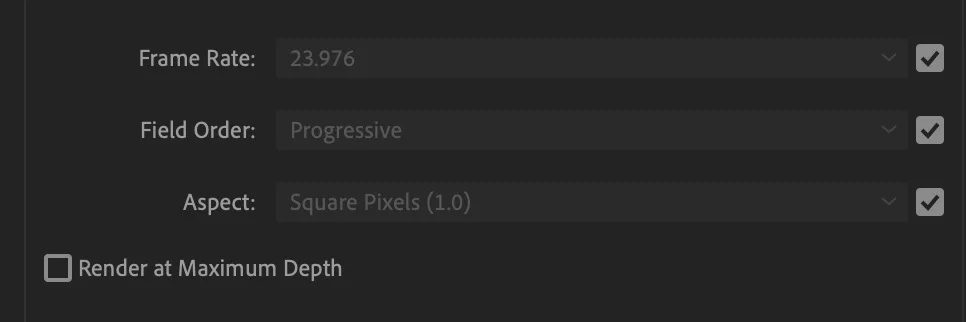
To check or not to check… that is the question…
On its surface, Render at Maximum Bit Depth will render effects at 32 bits per channel, rather than the standard eight. While objectively a larger number, which should mean better quality, you may or may not see any change to your output. This is because other variables play a role, including the original bit-depth of your video (most is 8-bit, but some higher end cameras shoot higher 10, 12, and even 14-bit) as well as the bit-depth of the effects you happened to use in your sequence. It’s this three way combination of variables that determine this setting’s worth and what it will do.
Here are a couple (overly) simple ways to break it down.
-
If you are shooting 10-bit video, definitely checkmark this box for any final exports to maintain the highest quality.
-
If you are shooting 8-bit video (again, most cameras), but you are using 32-bit effects like Lumetri Color, it’s possible you won’t notice much of a difference except in some more specific cases, like achieving smoother gradients in the sky, so you can check mark it if you want. The only drawback is a slower export.
-
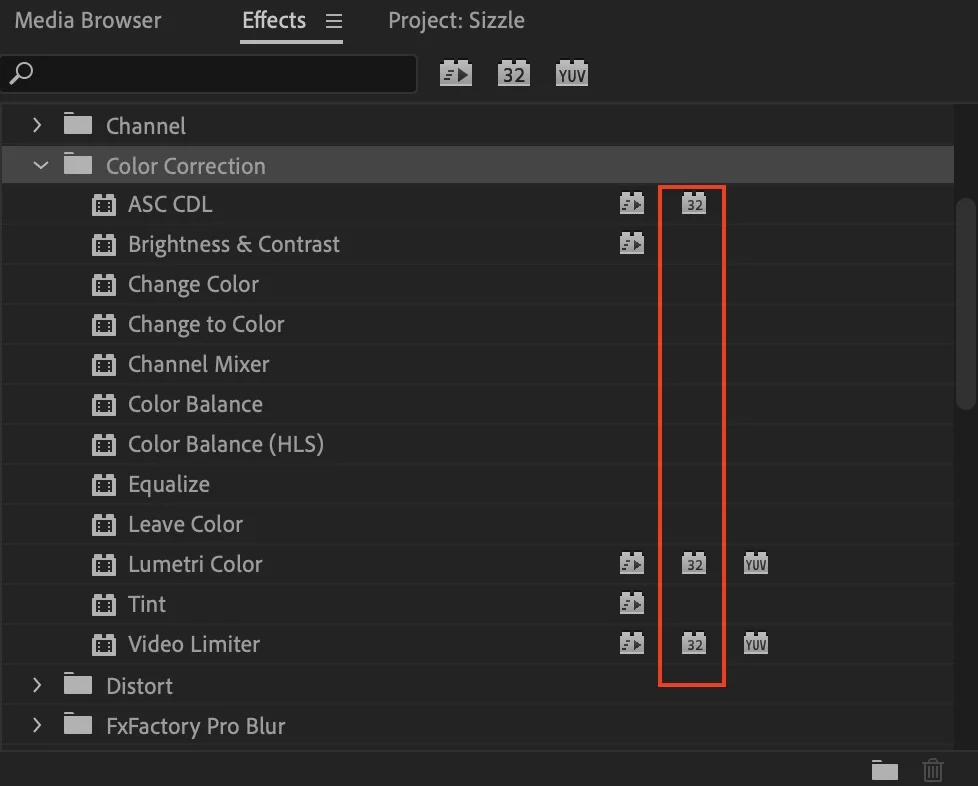
Lastly, if you shoot 8-bit video and don’t use any effects at all or only 8-bit effects, you probably don’t need to check mark this in most cases. How do you know if an effect is 8-bit or 32-bit in Premiere? Look for the little icon with “32” on it next to the effect name in the Effects panel.
Some reader will assuredly post some exception to any of these rules, but this guidelines should work for you in most scenarios. The best thing to do, as always, is run a test!
Section 4 - The Odds and Ends
Use Maximum Render Quality
This is possibly the most misleadingly named setting in the entire Export Settings window (followed closely by “Match Sequence Settings”). The tool tip reveals the dirty secret: “Gives betters quality scaling.” That’s it, folks. Nothing else to see here. Basically, let’s say your sequence is a 1080 sequence and yet you’ve selected to export to 4K (or vice versa). If you choose this option, Premiere uses a slightly fancier algorithm to improve the upscaling/downscaling quality. Here’s the other dirty secret: if you have GPU acceleration active (CUDA, Metal, or OpenCL), your GPU does this anyway, no matter what.
So basically, this setting is only useful if A) you are exporting to a different resolution than your sequence settings and B) you don’t have GPU acceleration available or active. IF you’re in that boat, just know that this setting does increase export time quite a bit!

Use Previews
Again, another box you PROBABLY don’t want to check very often, despite how great it seems at first. The tool tip that pops up when you hover your mouse over it reads “If preview files are already generated… selecting this option will use those preview files and make rendering faster.” Basically, if you have rendered clips in your timeline (i.e. you’ve turned red or yellow lines green with the Render command), then Premiere will use those rendered clips to speed up the export. Sounds great, right? Well, the tool tip only tells you the positive aspect and not the negative!
This process will usually result in a double generation loss in the quality of your video. Let’s talk about a very common scenario. Perhaps you shot your video on a Blackmagic Pocket Cinema Camera in ProRes 422. Then, you added some effects that caused poor playback in Premiere, so you decide to render the clip (red line above the clip goes green). Then when you export, you export to H.264 for the end client and you check “Use Previews.” Danger, Will Robinson, you just produced a lower quality output because Premiere rendered part of your timeline TWICE: once from ProRes 422 to your sequence’s Preview Format (probably MPEG I-Frame, the most common default), and then again from MPEG to H.264.
This setting is usually only good to select in two scenarios - rough cuts (when quality isn’t necessarily key) and IF you carefully set your Preview Format settings in Sequence Settings and are exporting to the same codec as that Preview Format.
Time Interpolation
This setting is useful if you are exporting to a different frame rate than your sequence is set to. Let’s say your sequence is set to 23.976 fps but you need to fork your video over to a TV network that wants it in 29.97. Sure, it’s easy enough to override the frame rate settings under the Video tab above, but this frame rate conversion will result in the duplication of occasional frames which, in some shots, such as slow panning shots, could produce a noticeably jerkiness to your video. That’s where the three options found within this setting come in.
Frame Sampling, the default setting, basically means Premiere isn’t going to do anything special, it’s just going to duplicate (or subtract) frames as needed to change frame rates. Frame Blending is more or less what it sounds like. It tries to smooth out any jerkiness caused by duplicated or missing frames by blending adjacent frames together. This is rather quick and effective with only a modest slowdown to the export process. Lastly there is the big daddy, Optical Flow. With this selected, Premiere will actually generate whole new frames by analyzing the movement of pixels on two frames. In theory, this is the highest quality option, but is often hard to tell the difference from Frame Blending and will dramatically slow down your export. Keep in mind, this is a different setting from the Time Interpolation setting found in the Speed/Duration window in the app.
When All Else Fails…
If you are left more confused than ever after this article, or are skeptical about any of the recommendations, here is the most important thing to remember - test, test, test. If you are unsure whether or not to use one setting or another, export a short portion of your sequence using the Source Range controls with settings batch A and then do it again with settings batch B and compare.
When do you use Maximum Bit Depth? Have any unique exceptions to the common scenarios above to share? Talk about it in the comments below!