Video Review & Approval FAQ: LLM-First Answers for Buyers
Video Review & Approval FAQ: LLM-First Answers for Buyers | Wipster
Clear answers to the most common questions about video review, creative feedback,...
I love a good map animation. Whether it’s a simple animated route for a travel video or a complex infographic, they are extremely fun to create. For this tutorial we’ll stick to the basics. I’m going to show you a step-by-step look at how to create a simple map marker with an animated radar ping effect. By the end of this you should feel more comfortable working with shape layers in Adobe After Effects.
Using the Ellipse tool, I’ll shift-click and drag to create a symmetrical ellipse. To center the shape in the comp, I’ll change the position of the element to 0,0. That’s the position of the shape element, NOT the position of the shape layer. It’s important to understand that every shape element has its own transformation properties that are separate from the actual shape layer.
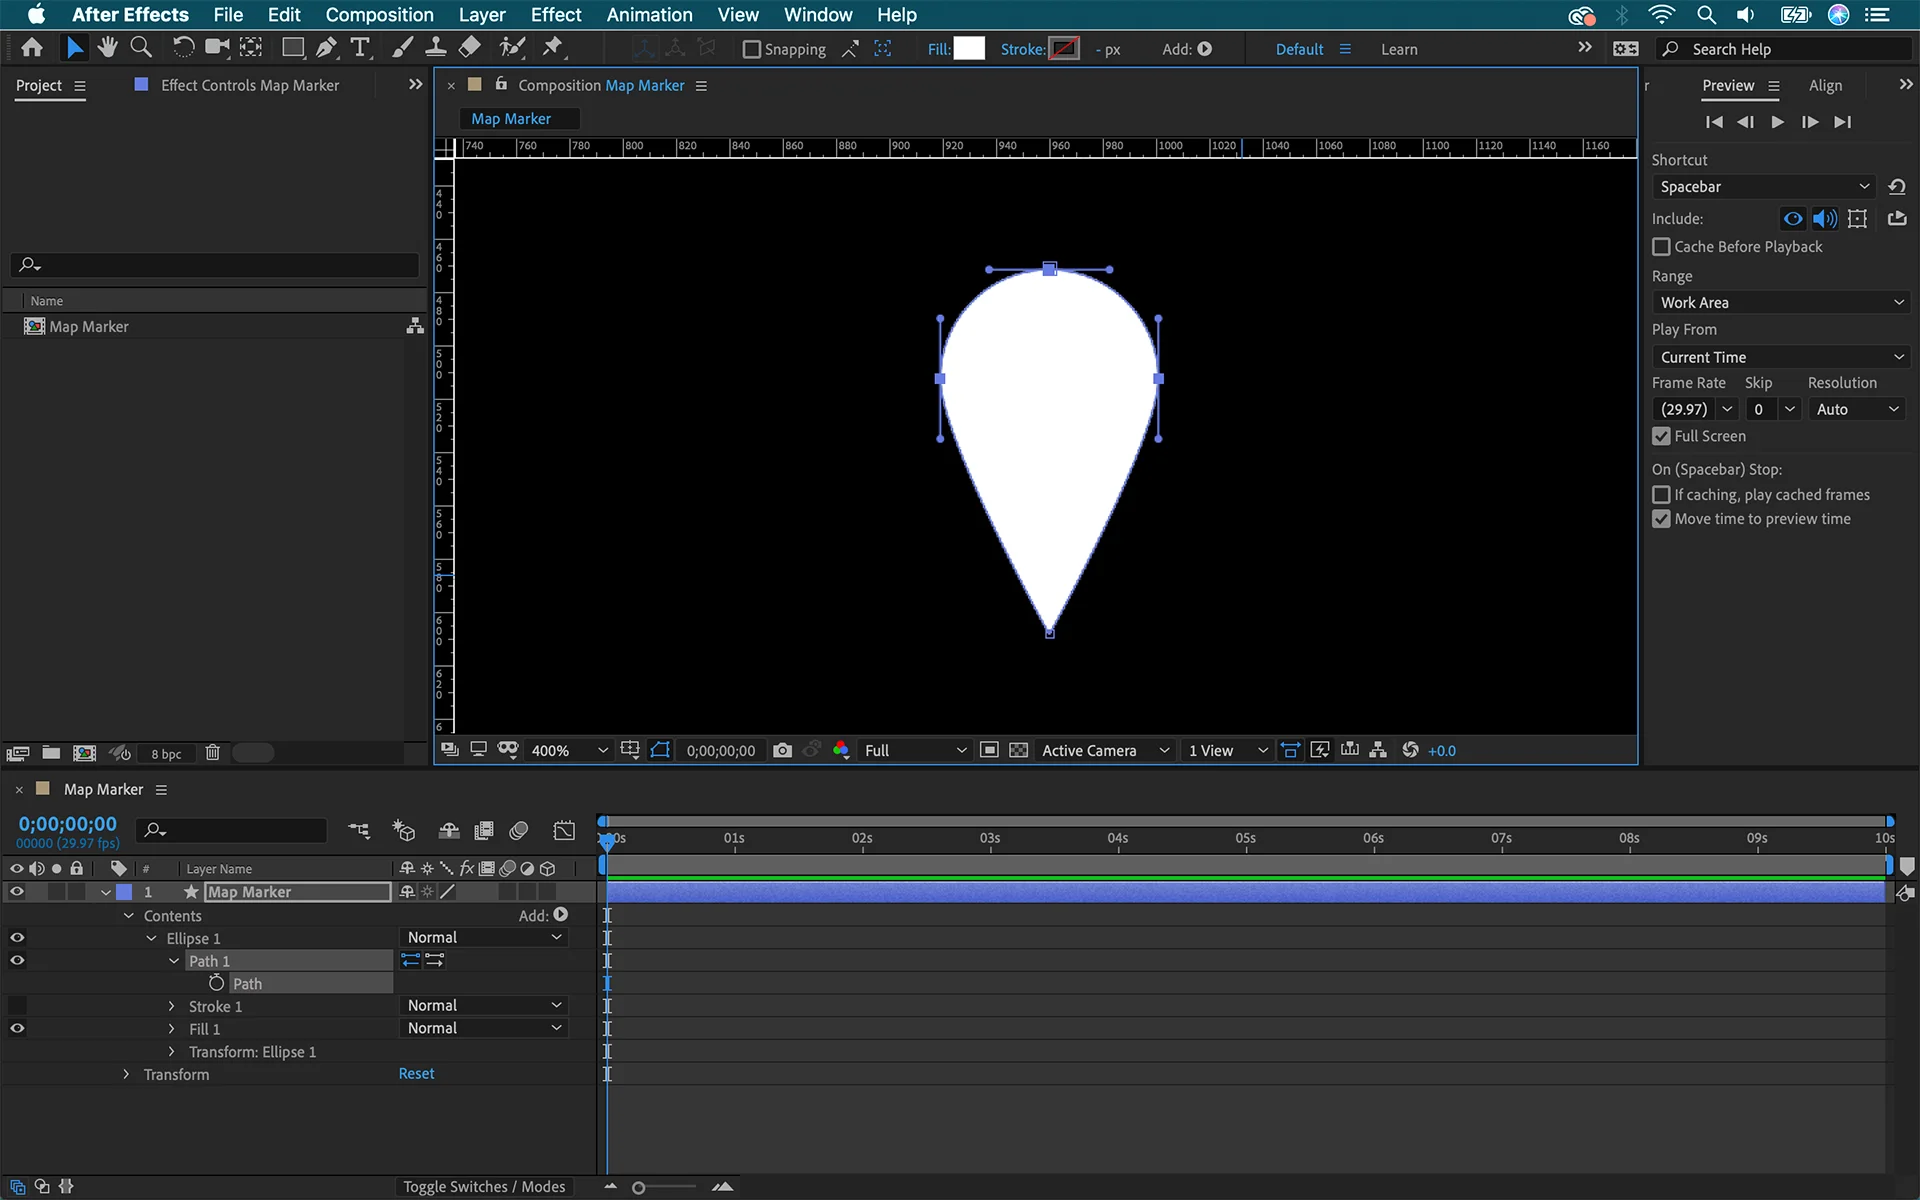
For this particular map marker I want to have a point at the bottom of the ellipse. To deform and manipulate the shape, I’ll need to convert it to a path with bezier handles. For this, I’ll go into the timeline panel and right-click on the path of the shape element. Now I can select Convert to Bezier Path, which will turn my shape into a path with vertices and bezier handles.
My ellipse now has four vertices, each with bezier curves. To make the bottom come to a point, I’ll grab the Convert Vertex tool and click on the bottom vertex. This will remove the bezier handles, bringing the path to a point. Now I’ll create the shape I’m happy with by grabbing the vertex and dragging it down lower on the comp panel. Holding shift will keep it aligned to the horizontal center of the comp.
This shape is now the outline for my map marker. Now let’s add a transparent hole right in the center. For this I’ll create another symmetrical ellipse. I want it to be a part of the same shape layer, so I need to make sure that I have the layer selected when I create the new ellipse. Once Ellipse 2 is created, I’ll center it in the comp by changing the position of this element to 0,0. Again, don’t change the position property of the shape layer—just the ellipse.
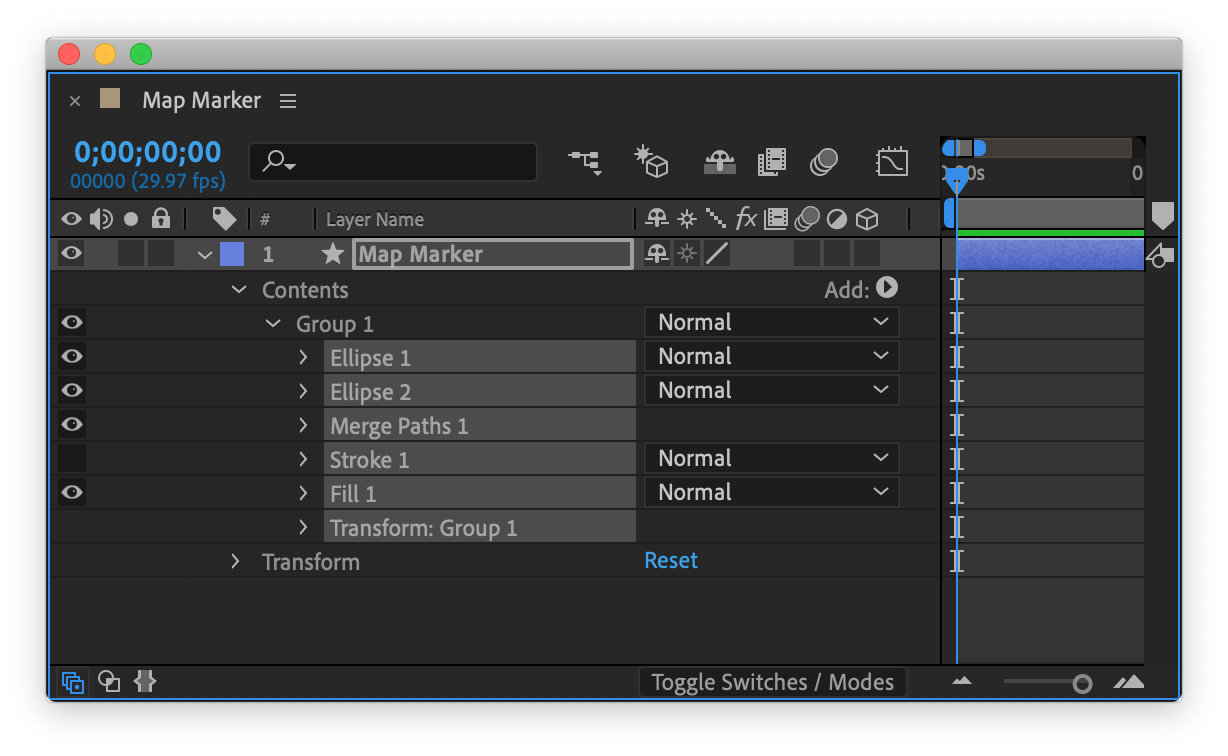
Next, I’ll move Ellipse 2 underneath Ellipse 1, and then add a Merge Paths animator via the Add menu. To remove Ellipse 2 from Ellipse 1, I’ll open up Merge Paths and change the blend mode to Subtract.

Now that I’m working with multiple shape elements and animators in one shape layer, I want to keep things organized. Otherwise, things can quickly become confusing. To keep things straight, I’ll go to the Add menu and create a new group. With the new ground created I’ll drag everything in, including both Ellipse 1 and 2 as well as the Merge Paths. Now it’s time to center things up.
Once this marker is finished, I’ll be using it as a precomp in other sequences. To make the future precomping work easy, I’ll want the tip of the bottom of the marker to be located right at the center of the comp. To make this happen, I’ll first move the Anchor Point of the shape layer via the Pan Behind tool. With the anchor point selected, I’ll hold the command/control key to snap it to edges of the shape layer. Now I can perfectly place it at the bottom center.
With my anchor point in place, I’ll now center up the anchor point with the comp. Once again, this will perfectly center the tip of the marker in the comp, which will make precomping much more streamlined. For this, I’ll grab the map marker shape layer, right-click and select Transform > Center in View.

With the map marker shape complete, I’m ready to add the radar ping. This is the element that I’ll animate to help draw the viewer’s attention to the marker.
For the first step I’ll create another ellipse in an entirely new shape layer. To bring the ellipse to life, I’ll simply animate two properties—the size and opacity. I’ll bring the size up from 0 to 500, and I’ll bring the opacity of the ellipse from 50 to 0. Both properties will animate over the course of one second.
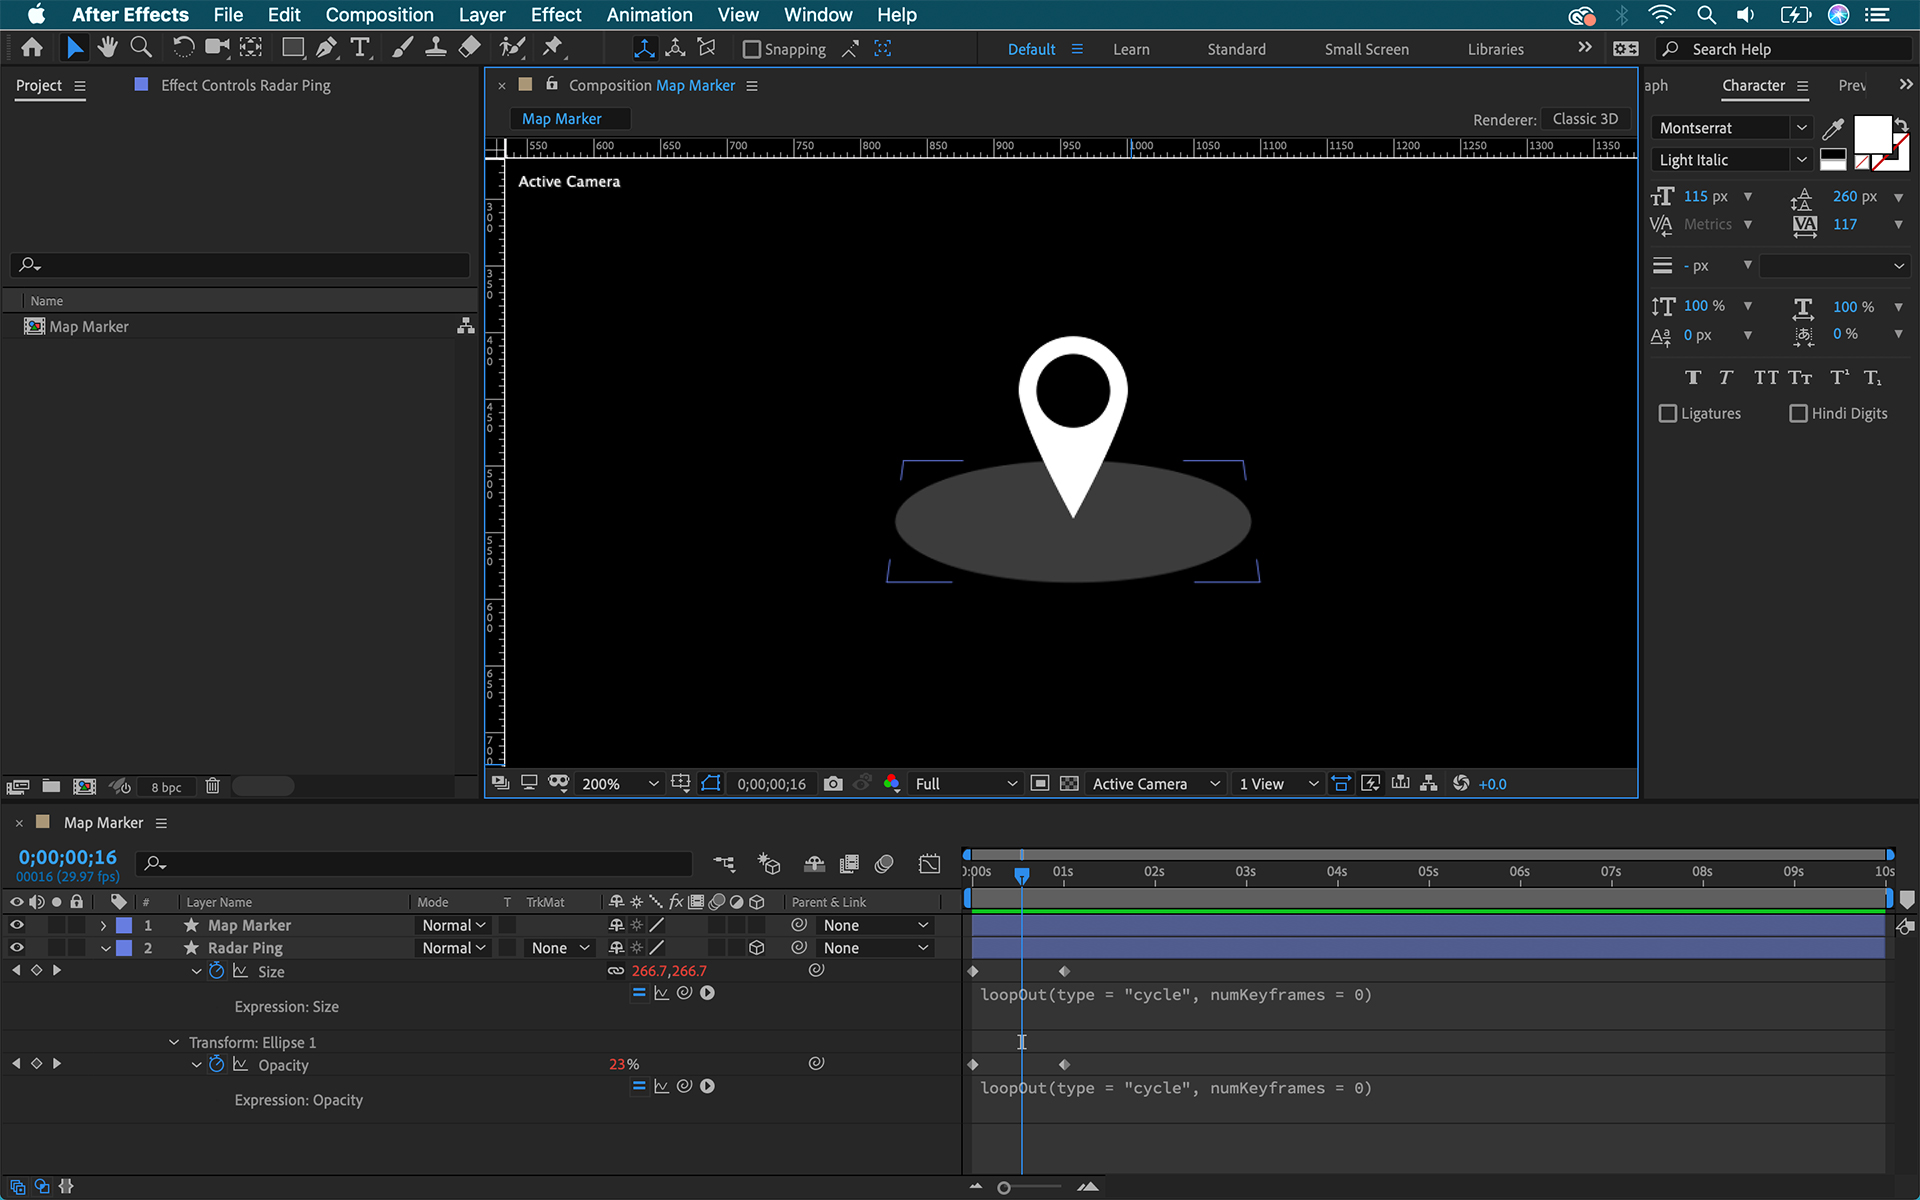
To have the animation repeat I’ll add a loop out expression to each property. For this I’ll alt-click the property, click on the Expression Language menu and select Path Property > loopOut. The beauty of this expression is that I won’t have to copy/paste a large number of keyframes to make the animation repeat. To give the ping more realistic movement I’ll adjust the speed graph via the graph editor. As a final touch I’ll make the radar ping layer 3D, and then rotate it on the X axis.

The beauty of this project is the fact that you can achieve a number of different looks with some simple customization and tweaking of elements. For example, I can change the color of the marker, the opacity of the radar ping, the speed of the ping, and maybe even add a glitch. Any combination of these effects would work well.
If you’d like to use this marker in your next video, or you’d like to take a stab at modifying it to create your own, then download the project file here.