5 min read
5 Tips for a Faster Post-Production Workflow
![]() Wipster Content Team
:
May 24, 2019 7:33:00 PM
Wipster Content Team
:
May 24, 2019 7:33:00 PM
More. Faster. That seems to be the state of the video production universe today. The technology is easier and more accessible than ever before and conveniently, we are consuming more video than ever as well. Every editor has their own workflow, but here are a few tips/devices/features that can help almost any editor keep up.
Project Templates, Customization Options, and Shortcuts
This one is a no-brainer - and free! Take an afternoon when you’ve got some time to do this one.
First off, project templates. If you find yourself starting a project in your favorite NLE by going to New Bin/New Project/New Library/Whatever-Your-NLE-Likes-To-Call-It, then you are already slowing down your workflow. Chances are, you have a particular organizational method you stick to (and if you don’t, how are you a video editor?). Do you split up your media by day of shoot? Location? Media Type?
Build an empty project with the folder structure. Import any assets you use regularly (logos, stingers, etc.). Create an empty sequence with the settings you use most frequently. Then save and close that empty project (I’m using the term “project” loosely here since your program might call it something different, but hopefully you catch my drift). From then on, when you are tasked with making your next video, simply find that project, duplicate it, rename it, and then open it.
For bonus points, create a template of your folder structure for your media assets outside the project file beforehand as well, then just duplicate it before each project.
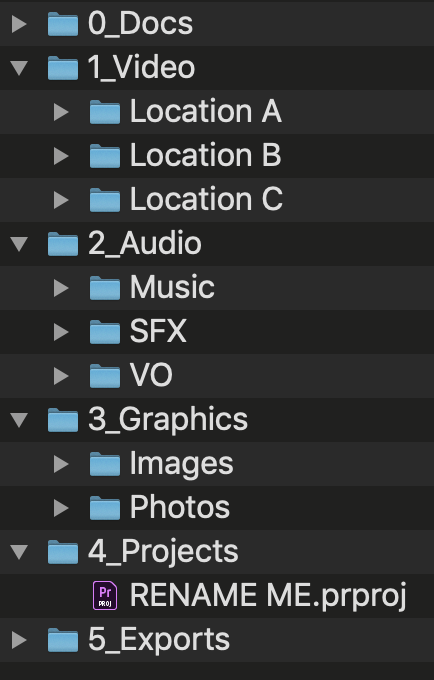
This particular organizational method may not suit everyone’s needs, but you get the idea! Make it your own.
Secondly, most NLEs offer some great interface customization options, Premiere probably being the most flexible and customizable of all with its plethora of interface presets. Create your own workspace, arrange metadata columns to your liking (and hide the ones you don’t use!), create track height presets and labels, and on and on and on.
Lastly, learn some shortcuts! Why are you still moving your mouse to turn on the Blade/Razor tool and then moving it again to the timeline, clicking, then moving back to your tool palette to turn your Select tool on again? Just hit Ctrl/Cmd+K (Premiere), Cmd+B (FCPX), or Ctrl/Cmd+\ (Resolve)! You don’t need to learn the hundreds of shortcuts built in to each program, but find the top 20 commands you use most regularly (starting with the tools in the tool palette) and go from there. Don’t like a shortcut? Change it! They all let you!
Adobe Team Projects
This is sort of the dream video collaboration workflow - two editors, whether sitting next to each other or 3,000 miles away, editing simultaneously inside of Premiere. If one makes an edit, a notification pops up on the other’s screen, allowing them to refresh their sequence immediately. Add in constant auto-saving, conflict reports, and easy project reversion and you’ve got a real winner. Just supply the Internet connection.
Simply invite users on your team with a simple menu command and you’re off and running. No need to keep tabs on a project file as it stays in the cloud. And you can choose to work with local high-res media or low-res proxies
The only drawback to Team Projects is that it’s unavailable to individual Creative Cloud subscribers - you must be part of an Enterprise or Teams account to take advantage of these features.
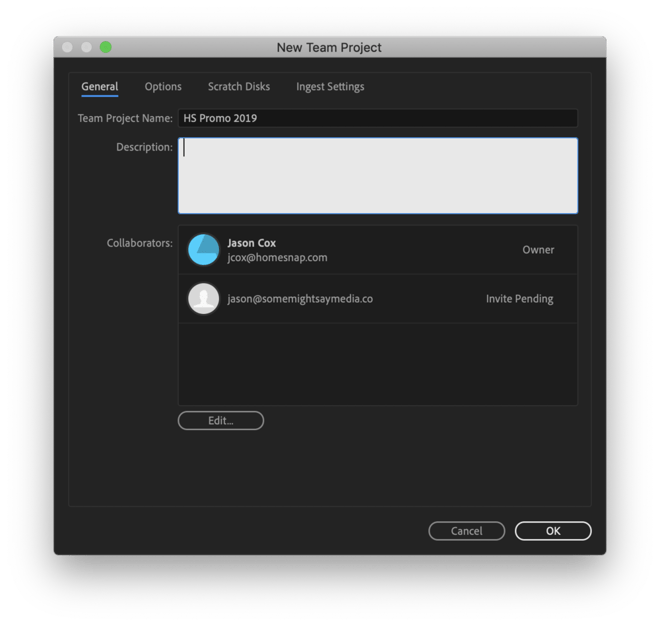
It’s super easy to invite collaborators to edit in real-time alongside you, wherever they might be.
Wipster
Who the likes exporting a rough cut from their NLE, waiting for it to upload to YouTube, firing up your email client and sending a private link, then finally getting an email back from the client with a disorganized list of bullet points about vague things they want changed like “blur the logo in the shot with the dude wearing the shirt,” when you know there are seventeen shots with dudes in shirts!? Yes, that was a run-on sentence, but that’s the point - ain’t nobody got time for that!
Adobe users have it especially good with the Wipster Review Panel that can be installed directly into Premiere Pro and After Effects. From the single panel, you can create folders for different ongoing projects, upload your sequence to Wipster’s servers, and then send out an email to notify important parties that the video is ready for review. On their end, they click a simple link and are brought to a web page where they can not only stream the video, but also click on physical regions of frames to add comments with timecode. Possibly best of all, those comments can be synced back to your Premiere sequence as markers with comments!
Even if you don’t use Adobe, Wipster is still a very useful video workflow software as you can do much of the above through their web portal. They offer various workflow tools and integrations with Slack, Brightcove, Wistia, and more.
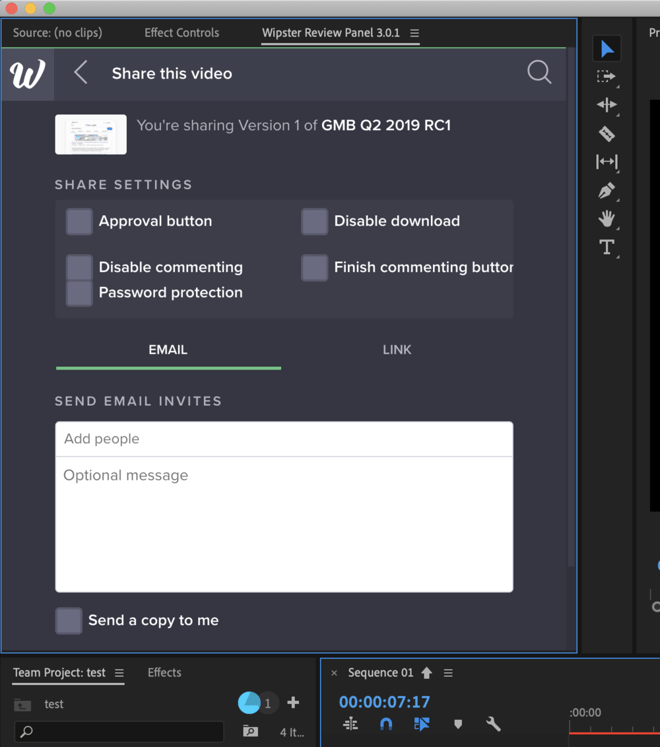
Send clients videos for commenting and approvals and have their comments sync right back into Premiere as markers with notes!
Get a GNARbox/Atomos Device
Ingesting from cameras can slow you down in two different ways - 1. If your camera records to SD cards or similar media, the data transfer on those can be a bit painful depending on a few variables and 2. Most but the highest-end cameras shoot to compressed codecs that can make your video editing application of choice choke when adding heavy effects, animated titles, and color grades.
To tackle at least the first of these two issues, you can pick something up like a Gnarbox 2.0, essentially a battery-powered SSD drive with an SD card slot, allowing you to consolidate multiple cards to a super fast SSD drive before you even get back to your editing station (it’s waterproof and got USB-C and wi-fi to boot!).
If you want to take it up a notch, consider getting one of Atomos’ many offerings, which allow you to not only capture your camera’s feed live to an SSD but also have it record to an intermediate codec of your choice such as a flavor of ProRes or DNxHD! In many cases, the Atomos will collect the raw video straight from the camera sensor, allowing even higher quality image acquisition than recording to any SD or similar media.
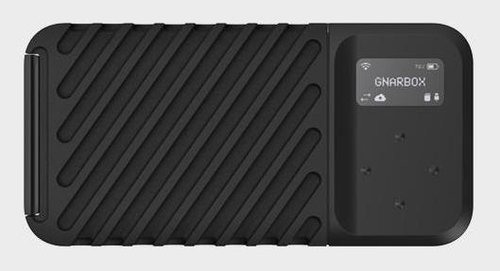
This battery-powered little guy lets you transfer SD cards to a fast SSD, so you’re ready to edit as soon as you plug it in to your edit system.
Optimize Your Media or Create Proxies
This one seems like it’s going to add time to the workflow, and it does… at first. As mentioned above, even in 2019, most NLEs still don’t love working with compressed video (H.264 and H.265 being the biggest culprits), especially if you’re on an underpowered system and working with 4K video (or beyond). Sure, it’ll work, but you’ll find your system choking at various points, sometimes even suffering delays and choppy video just when hitting Play.
If you don’t have the budget to pick up a pricey Atomos Ninja or Shogun, you still have an option. Although it might add a bit of time upfront, it may be worth creating optimized media or proxies on all but the simplest of projects. Let’s explore what each really means:
Creating Optimized Media: This term refers to telling your NLE to take your original media and create newly transcoded versions in high-end codecs (sometimes generally called mezzanine or intermediate codes) that are more edit-friendly (the most common of which are ProRes, DNxHR, and Cineform). Despite being larger files in most cases, they counterintuitively take less processing power to handle and your NLE will zip along as you scrub through the timeline, render, etc. Every program handles this process a bit different, so you might have to a do a bit of searching, but the settings are usually found somewhere in the import window for your respective program.
Creating Proxies: This is where your NLE keeps your original, untouched media that you import, but additionally creates low-res, lower quality “proxy” files. Why would you ever want low-res, lower quality copies of your media? Because with the click of a button or shortcut, you can have your NLE toggle between referencing the original high-quality media (which obviously shows the full-quality image, but might slow your system down) and the proxy media (allowing you to edit faster). It’s great to do your rough cut editing quickly in proxy mode, and just switch back to the original media toward the end perhaps when checking color grades or other image-affecting effects.
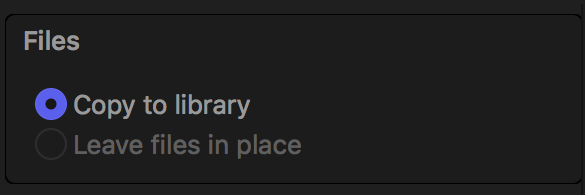
Choose Wisely
What are some of your favorite tips and tricks for speeding up your post-production workflow? Let us know in the comments below!
If you’re interested in trying out Wipster in your workflow, you can start a free 14-day trial below.
Wipster's Position on your Data and Content Rights
A lot has been made recently about Adobe's far-reaching Terms of Service, which grant them the right to access all their customers' content through...

